9 Tips to Follow While Installing Home Fire Sprinkler Systems
If you are concerned regarding the installation of a home fire sprinkler system, then you can feel rest assured that it is quite feasible to perform this installation on your own in the DIY (Do-It-Yourself) method. However, to be on the safer side, you should ideally consult a professional, experienced in smoke management systems if you have any doubts about your proficiency in handling the plumbing and electrical aspects. It is recommended that you adhere to the instructions provided by the manufacturer of your particular sprinkler system.
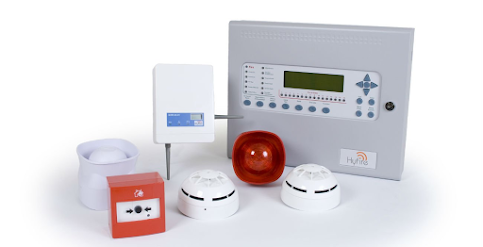
Your fire alarm systems in Glendora may have triggered and you may need to extinguish a fire with the help of a sprinkler system. In this write-up, we have identified the following tips necessary while installing a fire sprinkler system in your home.
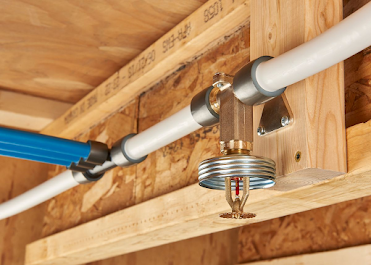
Piping Installation in the Basement
Piping will allow the flow of water from the supply in the basement over the ceiling to the top-floor sprinkler heads. These pipes are designed with CPVC and are quite similar to PVC. However, it can resist more heat and is less likely to melt in a fire. You can join the pipes with pipe cement. Also, you may connect pipes to the studs along with the ceiling by applying galvanized pipe straps.
Check Your Water Supply Pressure
When you get sufficient pressure from your city water supply, the installation of the home fire sprinkler system will become simpler as the system can tie right in. A pressure of 100 PSI is okay. When you lack enough pressure, you may have to invest in a water storage tank and pump for the efficient functioning of the sprinkler system.
Create First-Floor Wall Cutouts
To make the first floor geared up for the sprinkler system, you'll have to conceal the piping inside the wall. To accomplish this, you must cut out portions of the drywall between the studs.
Set Cages Around the Basement Sprinkler Heads
Always place fire sprinkler heads in the basement. To avoid the sprinkler heads from accidentally being bumped and set off, fasten protective cages. This has particular significance in areas where the ceiling is low.
Hole Drilling to the Basement
Within the wall, drill through its bottom and the floor into the basement below. Install additional CPVC piping via the hole inside the basement so that it could be linked with the sprinkler line. Attach the piping within the wall on the top floor with the help of pipe straps.
Run Extra Piping
You must continue drilling and run piping as needed for the installation of the piping system where the sprinklers should be positioned on the first floor of the home. Apply your stud finder to confirm that you're cutting the wall open between studs, preventing any electrical wiring. When you don't wish to cut into the ceiling of the first floor of the home, you may rather contemplate mounting sprinklers high up on the walls.
Encase the Piping and Enclose the Wall Cutouts
When the attic isn’t insulated, the piping running through it has to be covered in insulation to prevent the freezing of the water inside the pipes. Wherever you've cut out drywall, you'll have to fix it. Piping running at the top of the wall may be shielded with the help of crown molding.
Installation of Bedroom Sprinklers
There could be the second or third levels in your home that you wish to run extra piping to. The same process is applicable with the first floor unless you run the piping through a closet. By applying this method, you may prevent opening up the walls on the second floor. But you need to apply metal piping rather than CPVC if it has to be exposed outside the wall.
Cut a hole in the floor of the closet to link with the piping you've run on the floor below. Now you have to run the piping from the second floor to the attic, where you'll forward it through the ceilings of the bedrooms. This proves that sprinklers can be installed in any room where someone sleeps. Place a cap on the indented sprinkler to conceal it from view.
Pressurize and Conduct a Leak Test
At this point, with everything connected and sealed, the system has to be pressurized and leak tested. Now your home should be ready to combat in the case of an unexpected fire.
Inference
If you get in touch with the best fire sprinklers systems service in California, then you can expect full-fledged protection from all odds.


Comments
Post a Comment